Since I've been at home I've found the need to clean and organize. While I was cleaning out our craft area I realized that our family has a lot of crayons - a LOT. About 1/3 of those crayons were broken, missing the wrapper or pretty well used. I decided to pull all of those crayons out and only keep the nice ones. I remembered that my neighbor had once mentioned that she and her kids made their own crayons, so I decided to get some information from her and let my kids do it to. We had such a great time together than I wanted to share the easy instructions with you!
DIY Crayons:
| 1) Gather the crayons that you want to use. I can tell you that the name brand crayons melt the best. (Some of the dollar store crayons and restaurant crayons we had didn't really melt at all) | ||
| 2) Remove the paper from all of the crayons. | ||
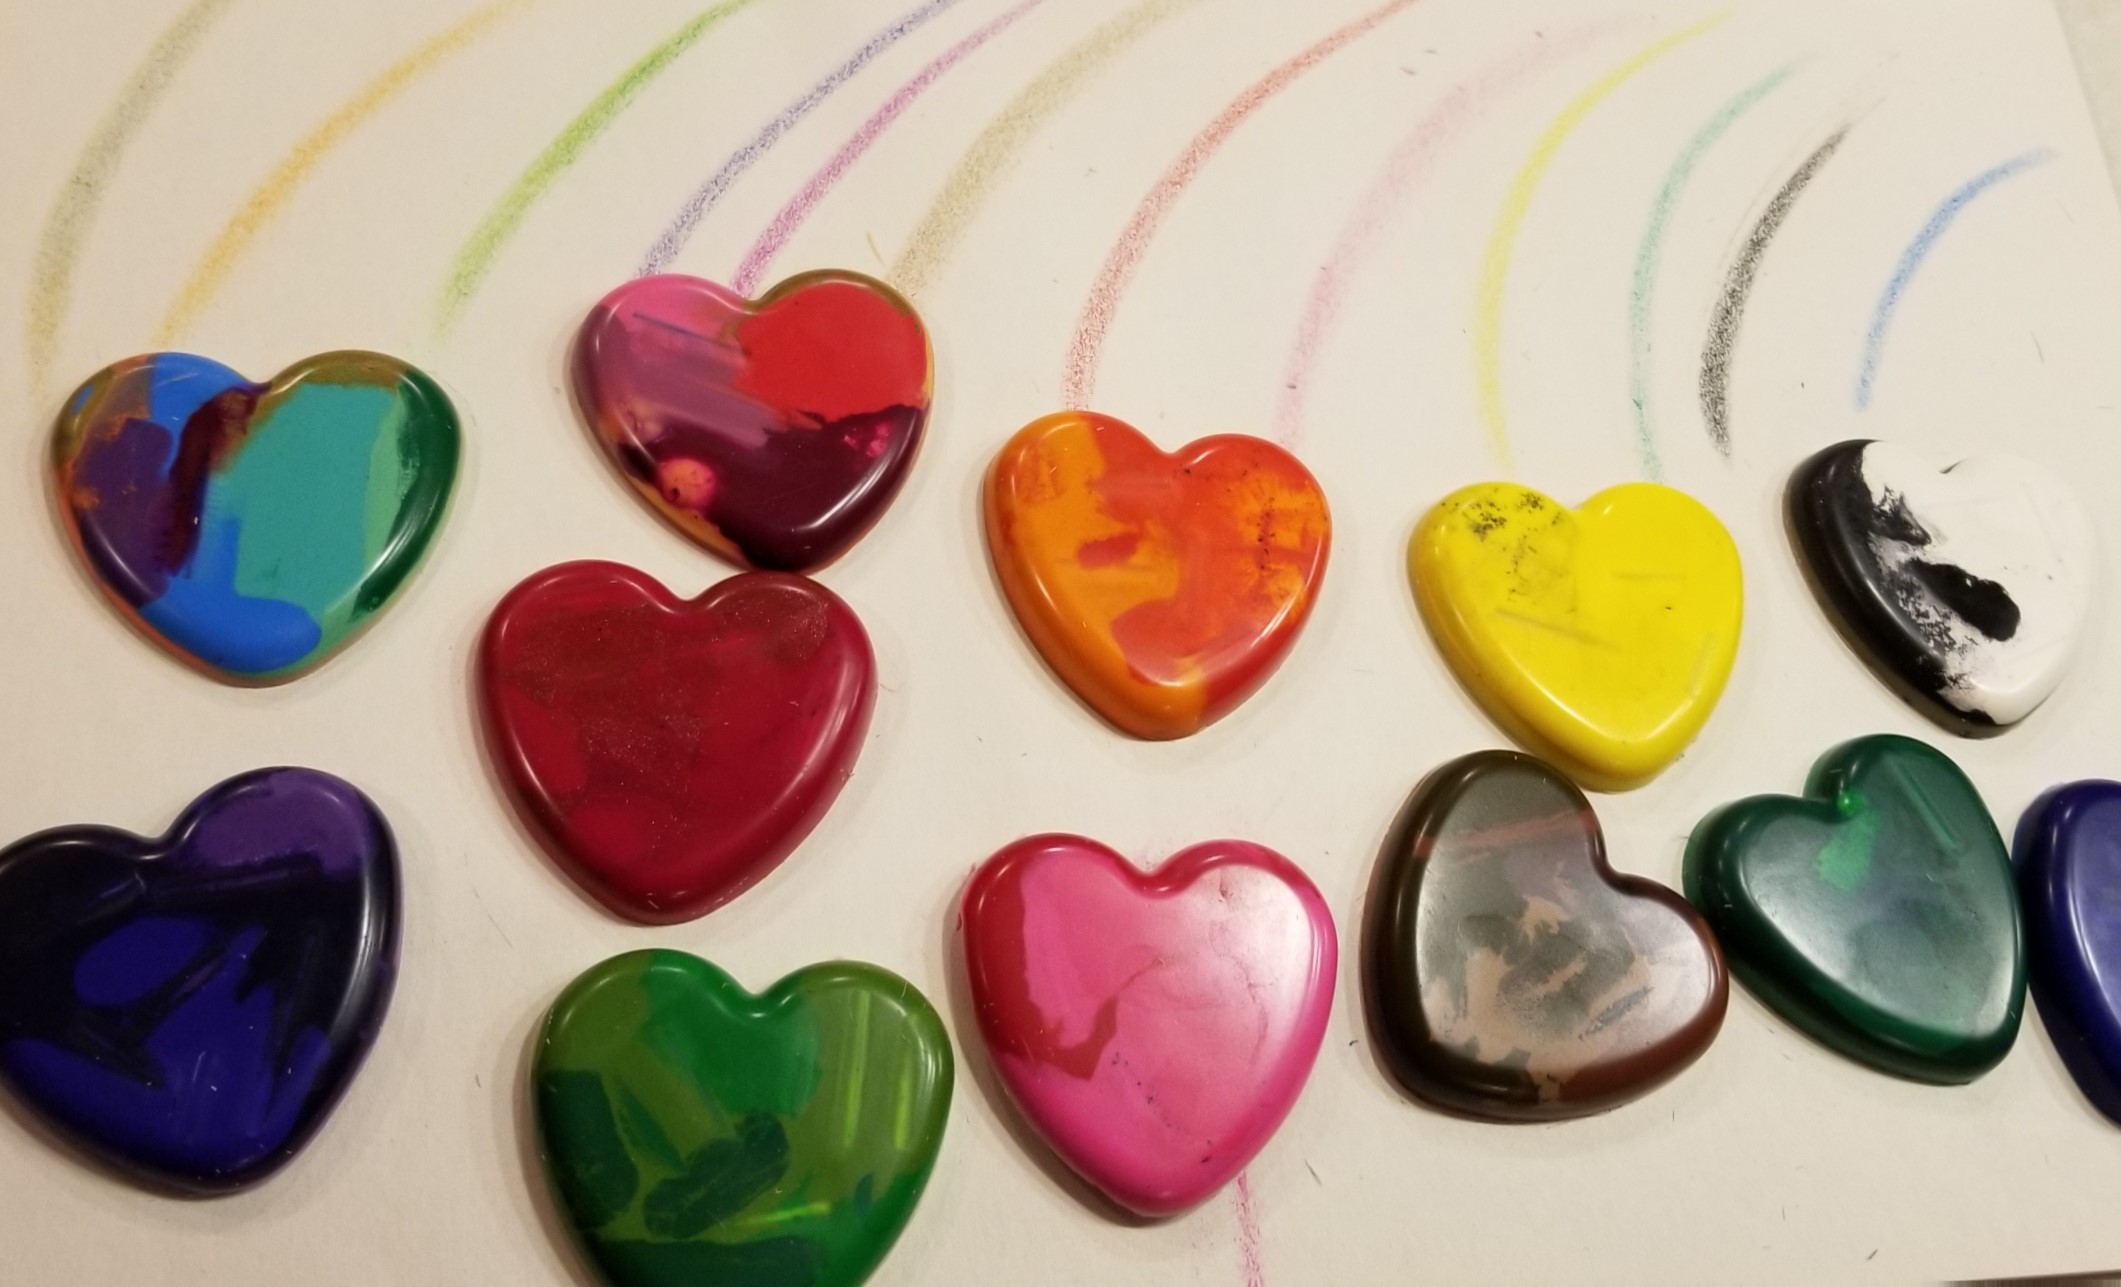
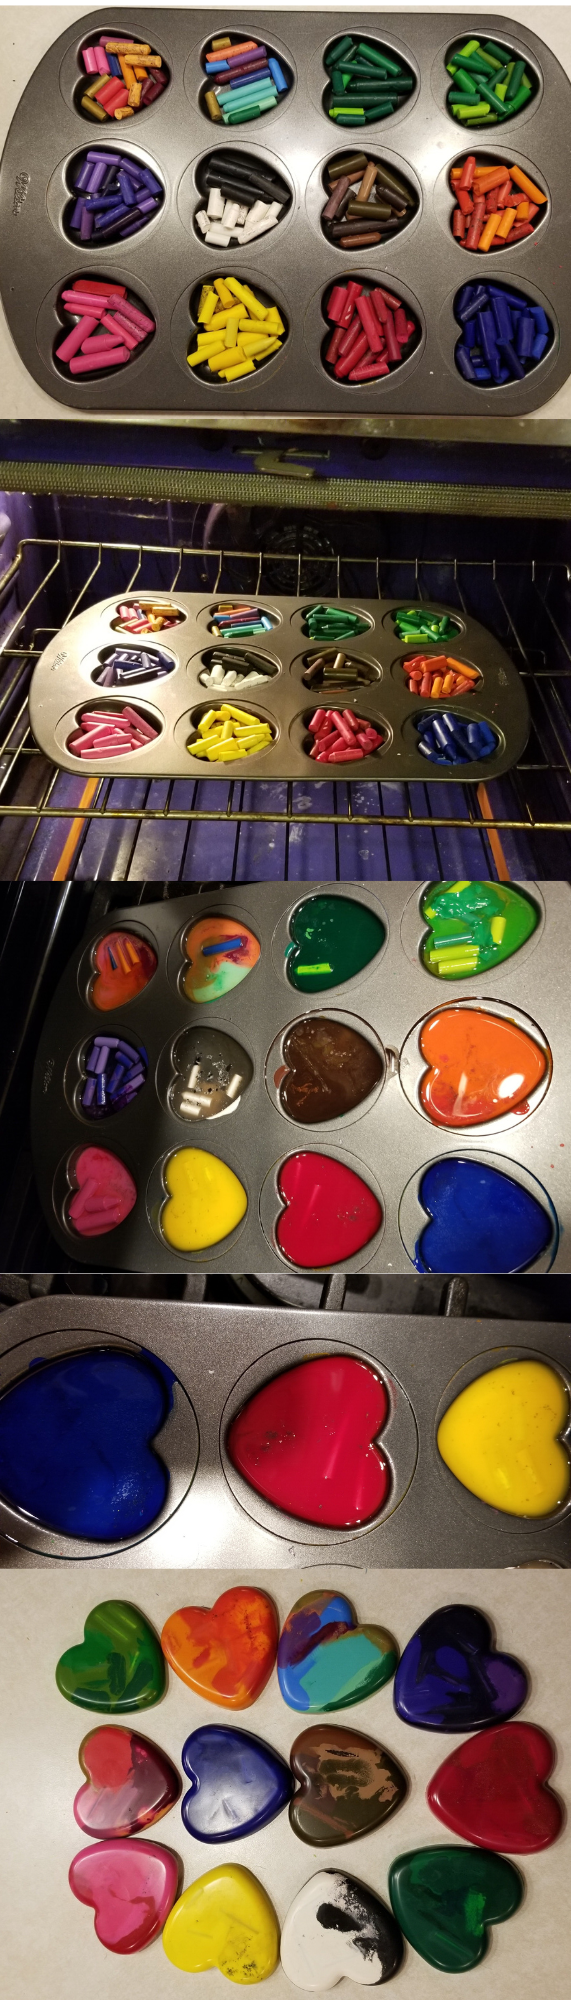 | 3) Sort the crayons. You can either sort them by color so that your new crayons are all one solid color, or you can mix the colors. We found that it worked best to only mix 2 colors and make it half and half. | |
| 4) Break the crayons into small pieces so they fit into the mold. Smaller pieces melt faster. | ||
| 5)Preheat the oven to 170 degrees. | ||
| 6) Put the crayons into a mini muffin tin or mold. (Whatever you use you wont be able to use for food in the future, so don't use anything you aren't willing to part with) We went with a mini heart pan. | ||
| 7) Put the pan of crayons into the preheated oven. | ||
| 8) Set your timer for 8 minutes and check on them. If they aren't melted put them in for another 5 and check again. Continue until melted. We baked ours for about 20 minutes, however if we had made the crayon pieces smaller I think it would have taken less time. We were also trying to use a combination of different brands of crayons and some just wouldn't melt. I think I could have probably removed them at about the 15 minute mark and had the same amount of melting. | ||
| 9) Remove the pan from the oven, being careful not to spill the melted wax. Set the pan on a flat surface. | ||
| 10) Allow the crayons to cool. We let ours cool overnight, however they were probably ready in a few hours. | ||
| 11) Color! |