I always welcome the fall season with open arms. Hello to the cooler days, changing leaves, and pumpkin spice everything! This season always gives me a warm fuzzy feeling as everyone comes together for apple festivals, pumpkin patches, and harvest fun! It also opens the door to crafting and decorating galore. I consider myself a pretty crafty person and enjoy making things to spruce up the house.
When it was finally time to put my craftiness to work and create a fall craft with the kids, I went straight to Pinterest for ideas. When I look for crafts, I look for cheap, cute, and quick. As a mom, you know you don’t have much time to devote to crafting, and if the kids are helping, you have even less time to try to keep them occupied. When I saw these cute little yarn pumpkins, I decided that they were a must-try, so I headed off to my local craft store. I was able to pick up a huge thing of orange yarn and some pipe cleaners for less than $5!
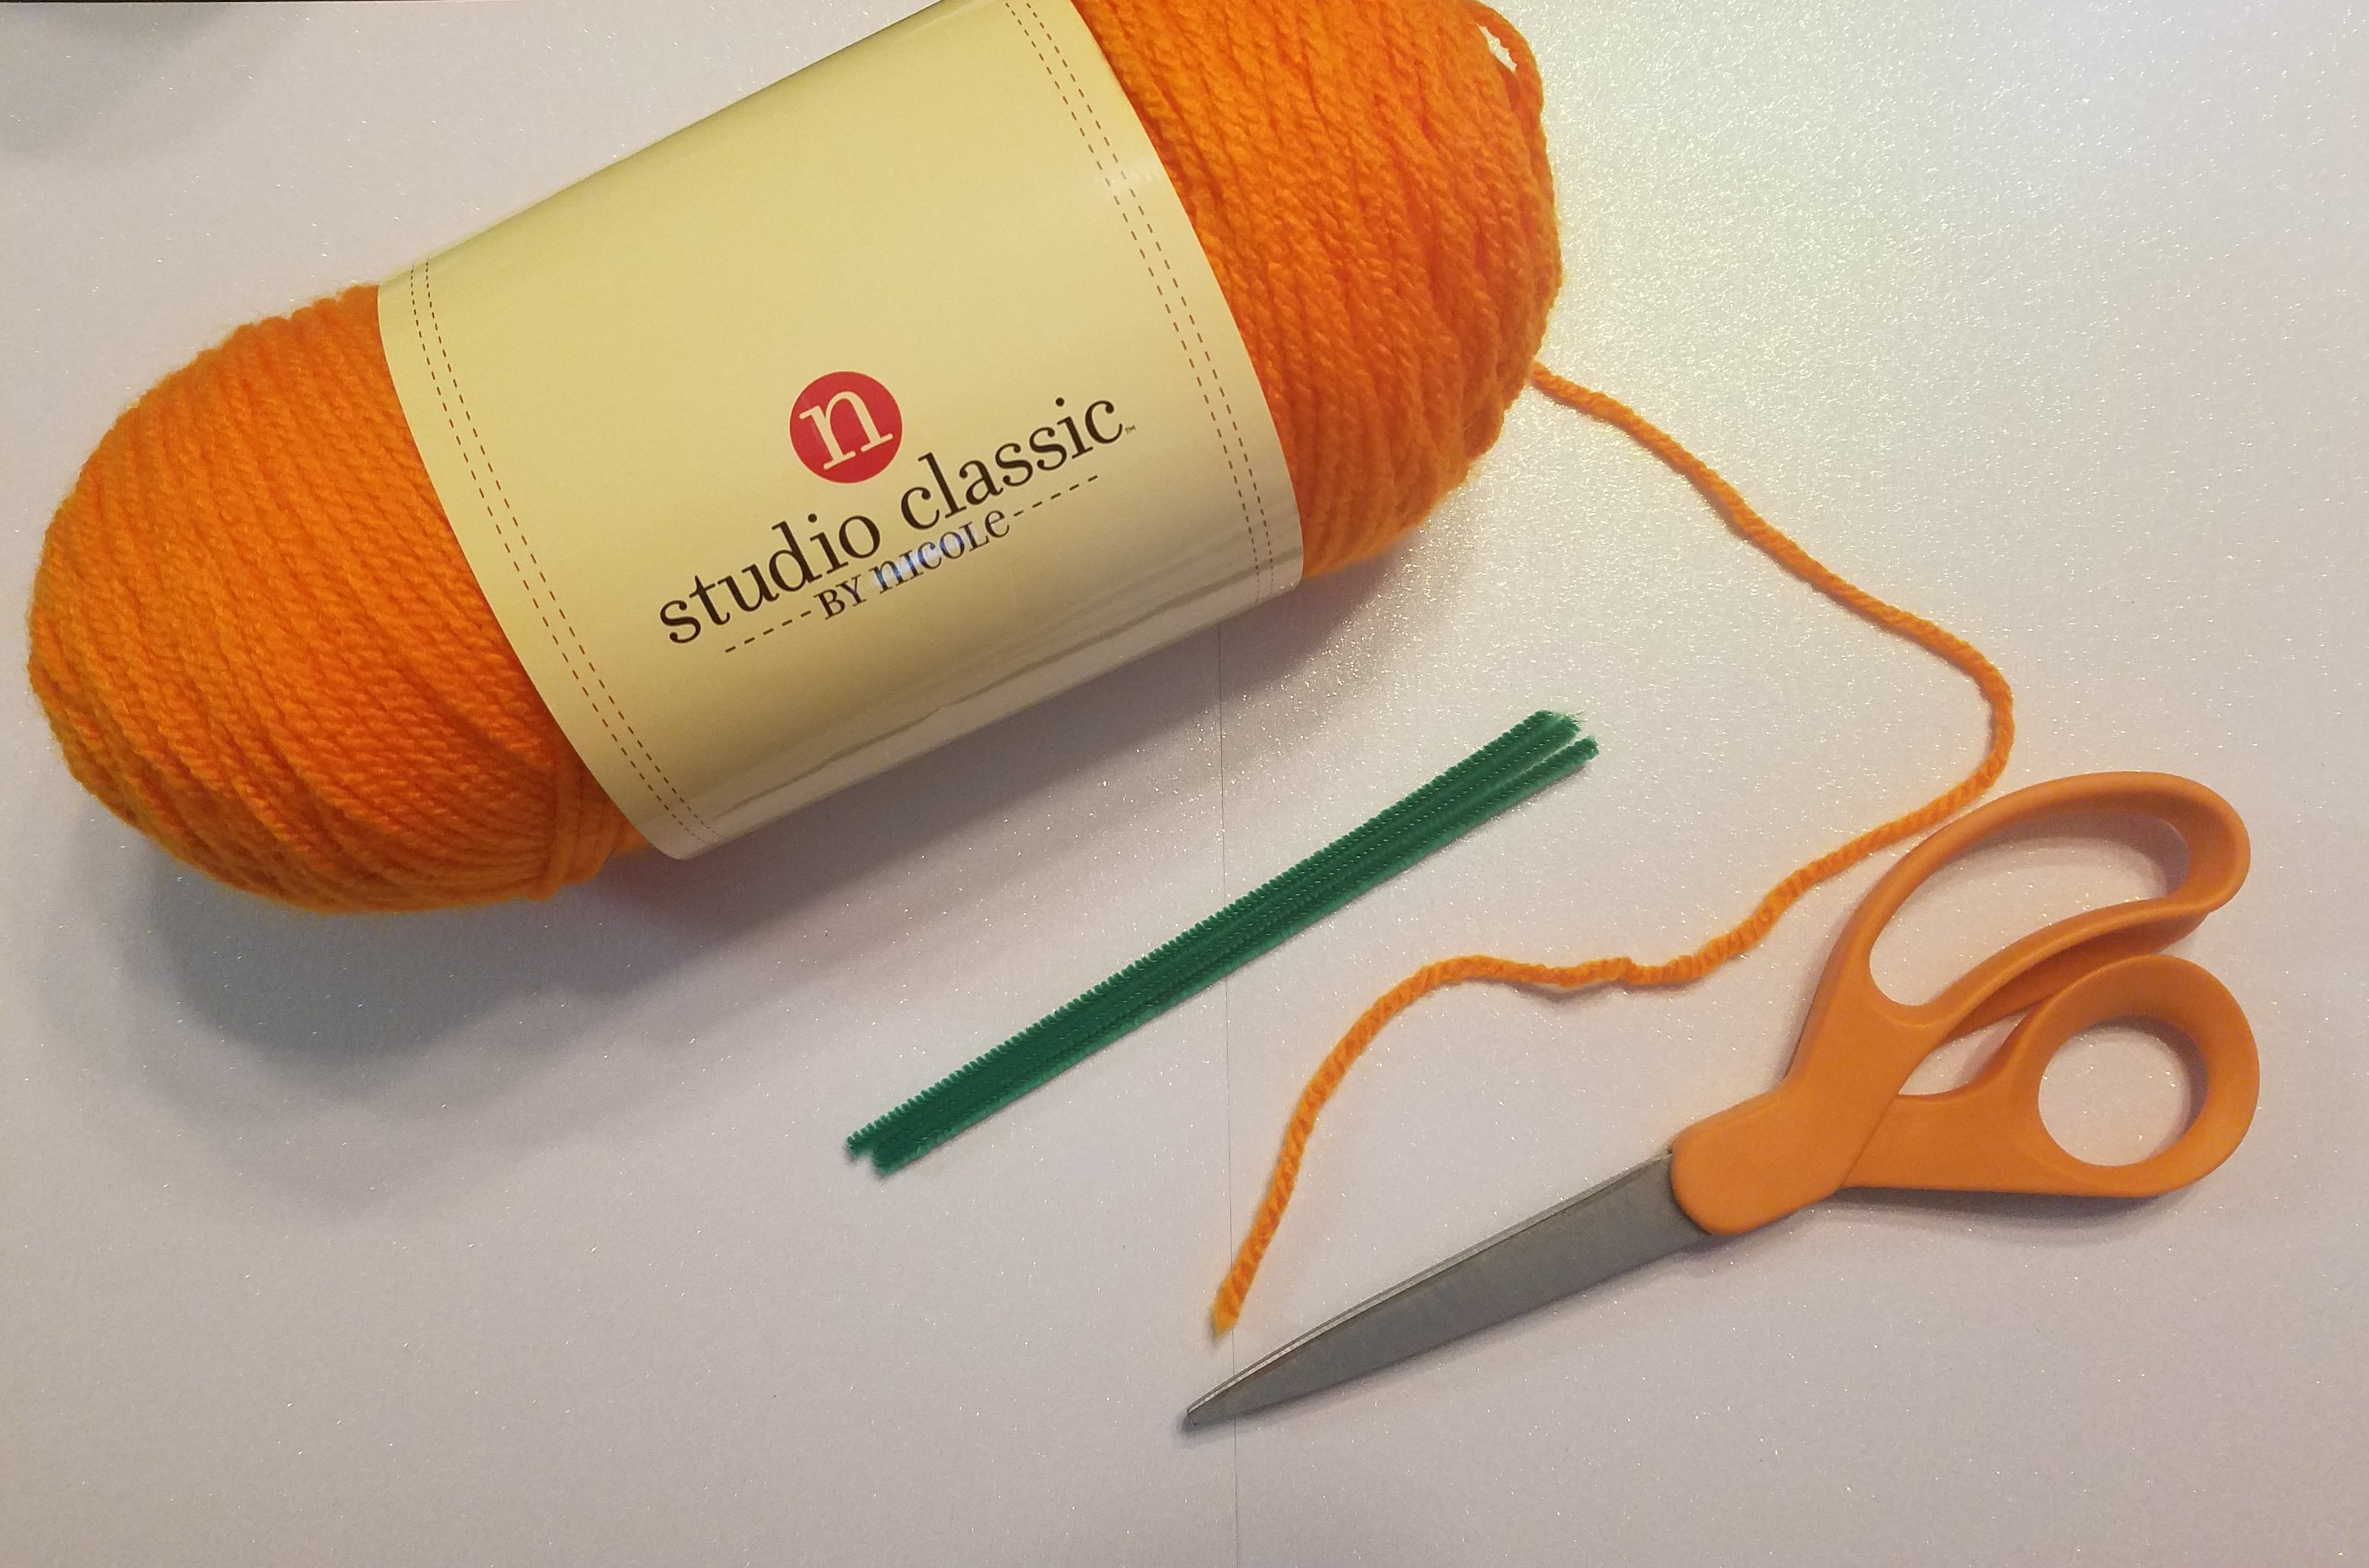
Here’s what you will need:
- orange yarn
- scissors
- green pipe cleaner
Here’s how to do it:
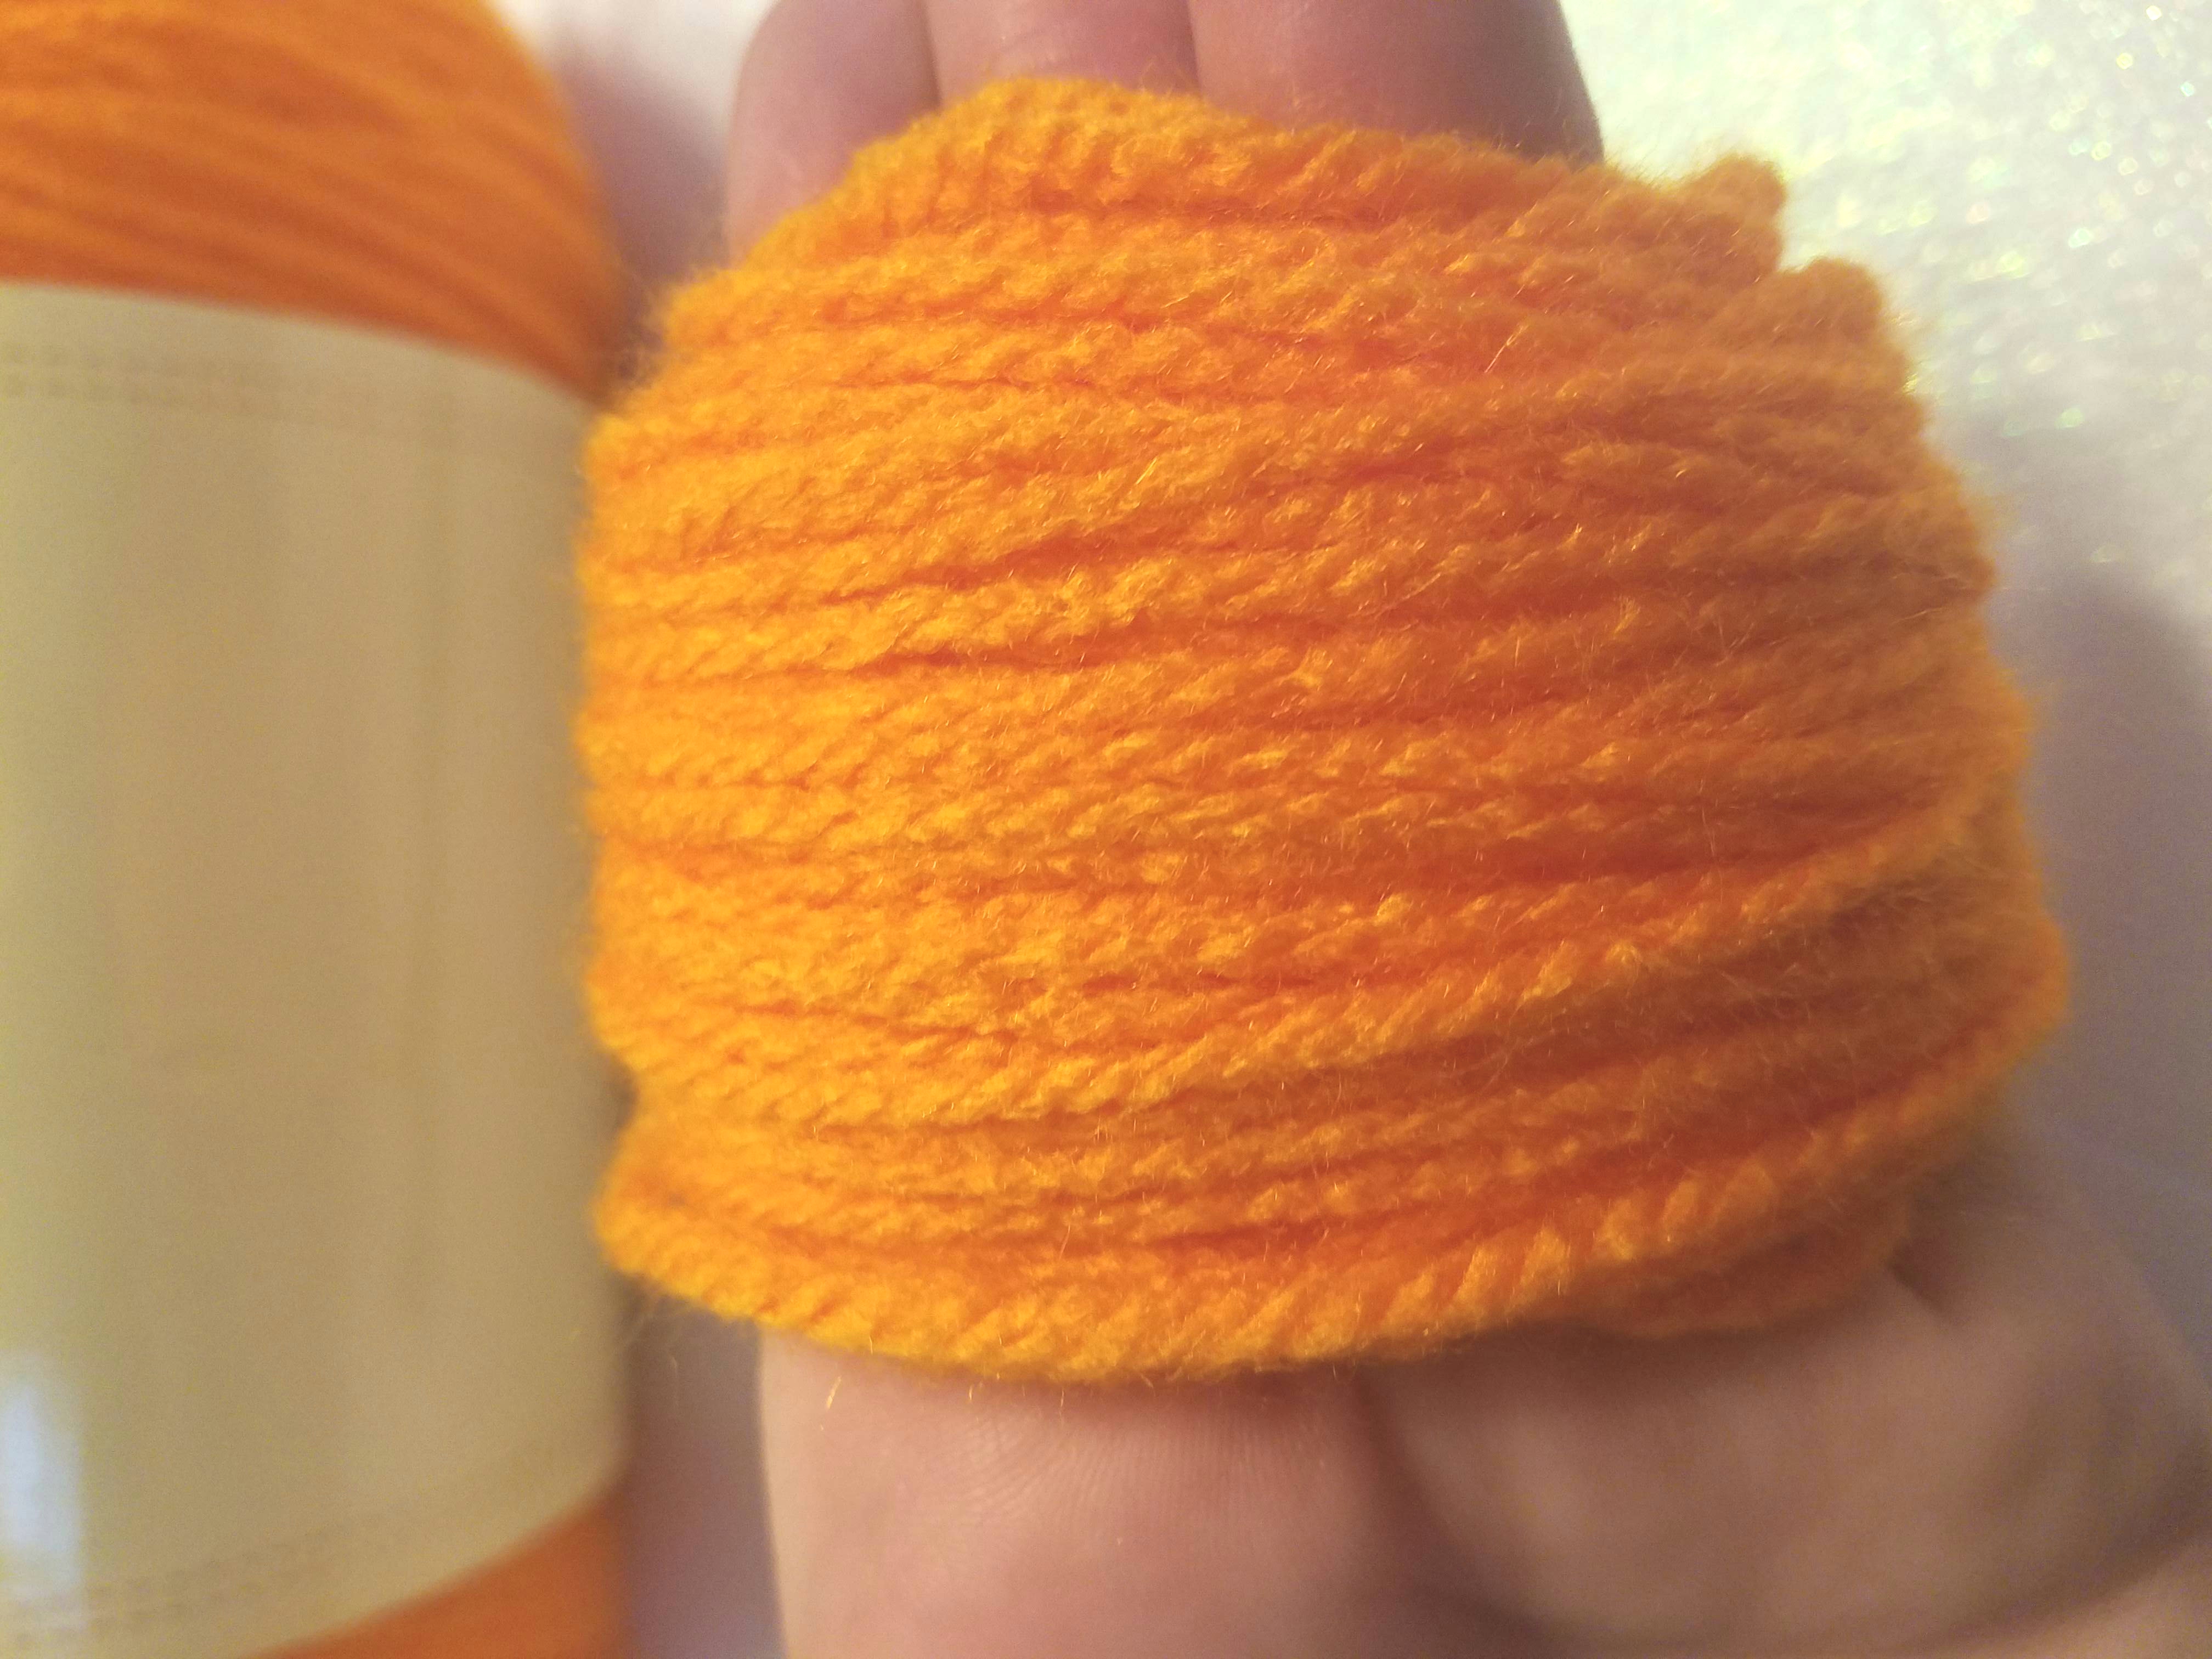
- Start by wrapping the yarn around your four fingers. I tucked the starting end to keep it nice and tight.

- Firmly (but not too tight or too loose) wrap the yarn neatly around your fingers about 120 times. The kids counted out loud with me (look at that, I added basic math skills into my craft! Mom win!).
- Once you are done wrapping, cut the yarn from the roll. Now cut a 10-inch piece of yarn.

- With the yarn still wrapped around your fingers, slide the 10-inch piece of yarn in between your two fingers.
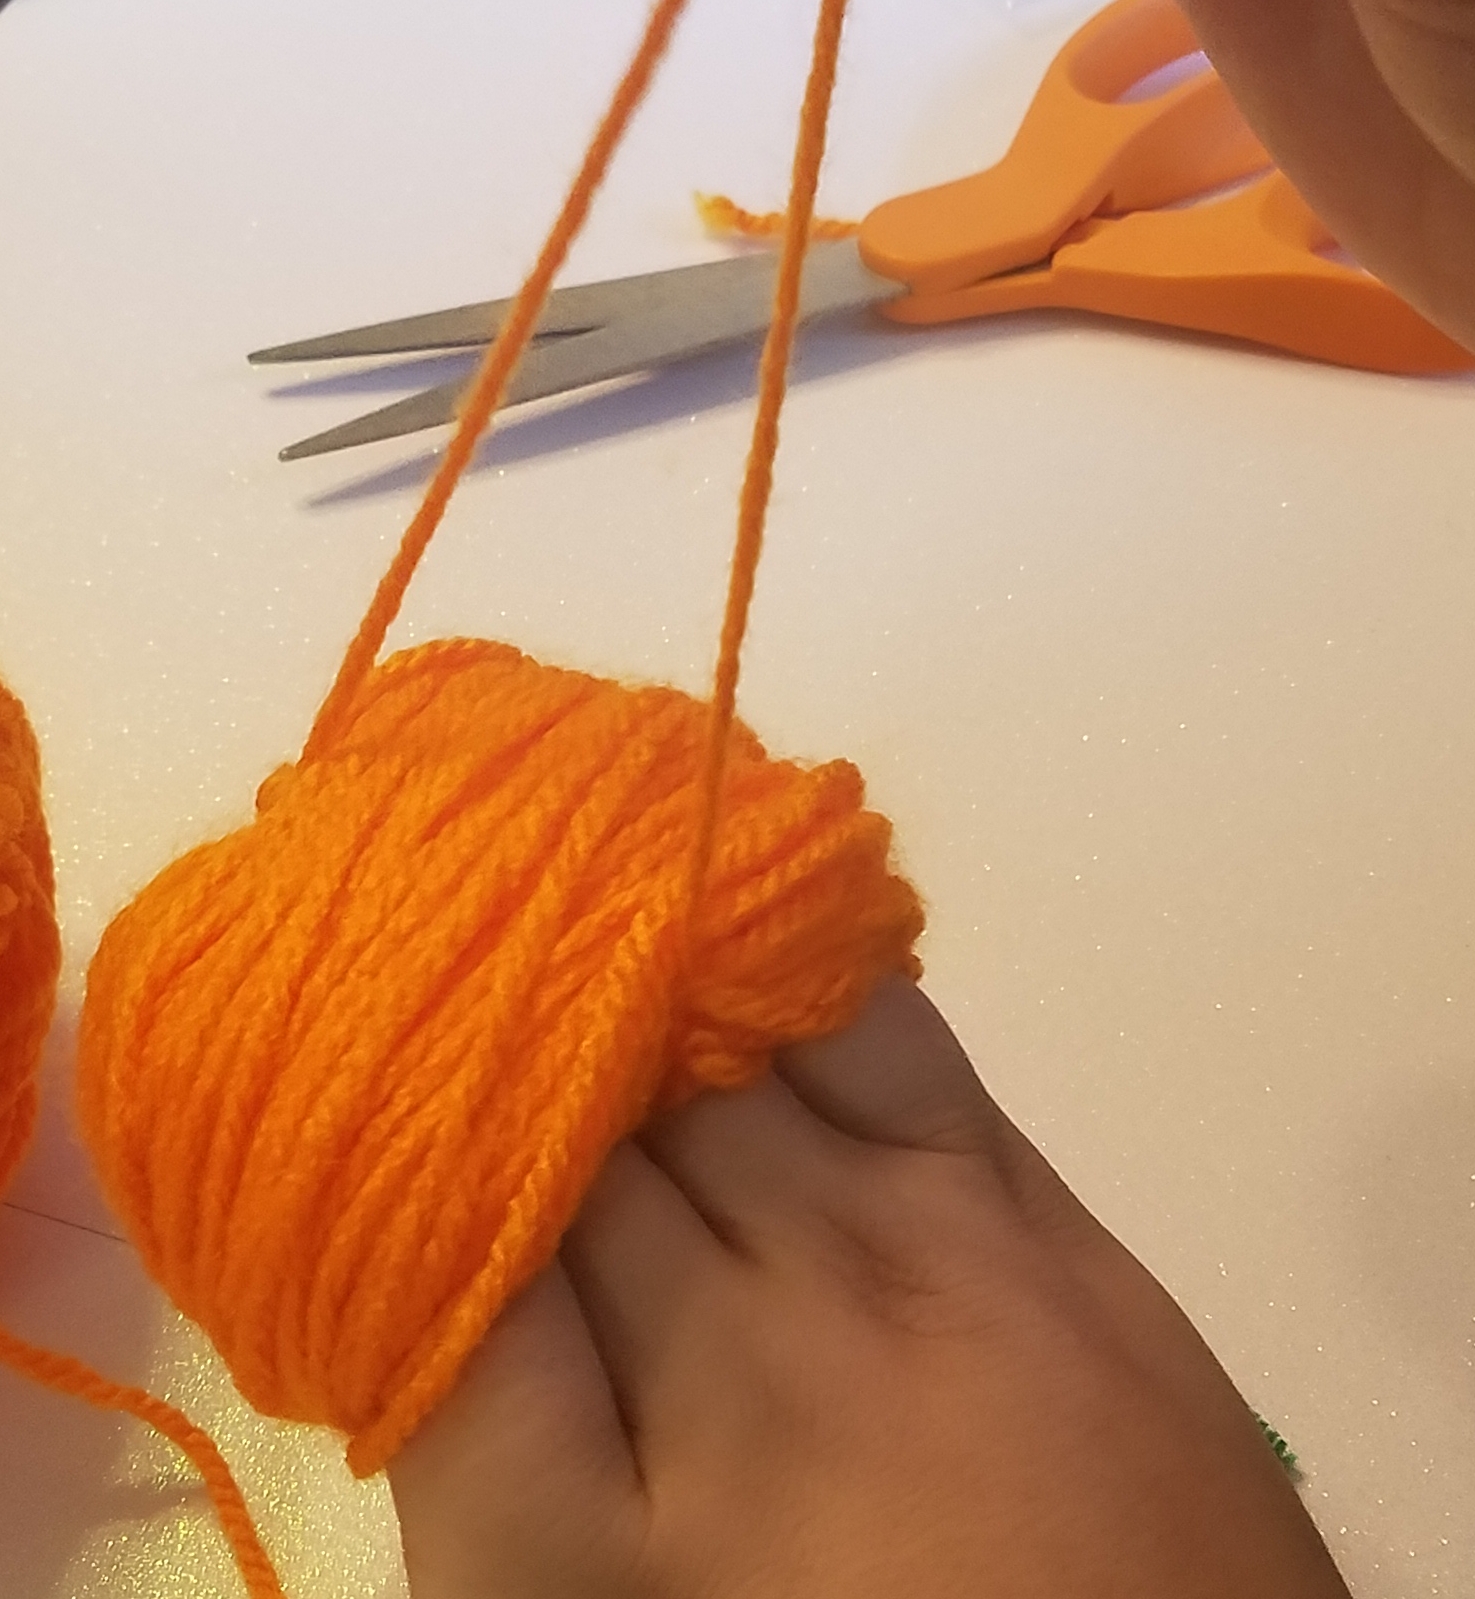
- Pull the 10-inch piece tightly around the wrapped yarn and carefully slide the yarn off your fingers and pull tightly and tie it off. You now should see your pumpkin shape. Fluff your pumpkin out to make it look neat and rounded.

- Cut a 2-inch piece of green pipe cleaner and tie it on the pumpkin with the yarn that is holding your pumpkin into shape. Now fold in half and twist the pipe cleaner together to create a stem.
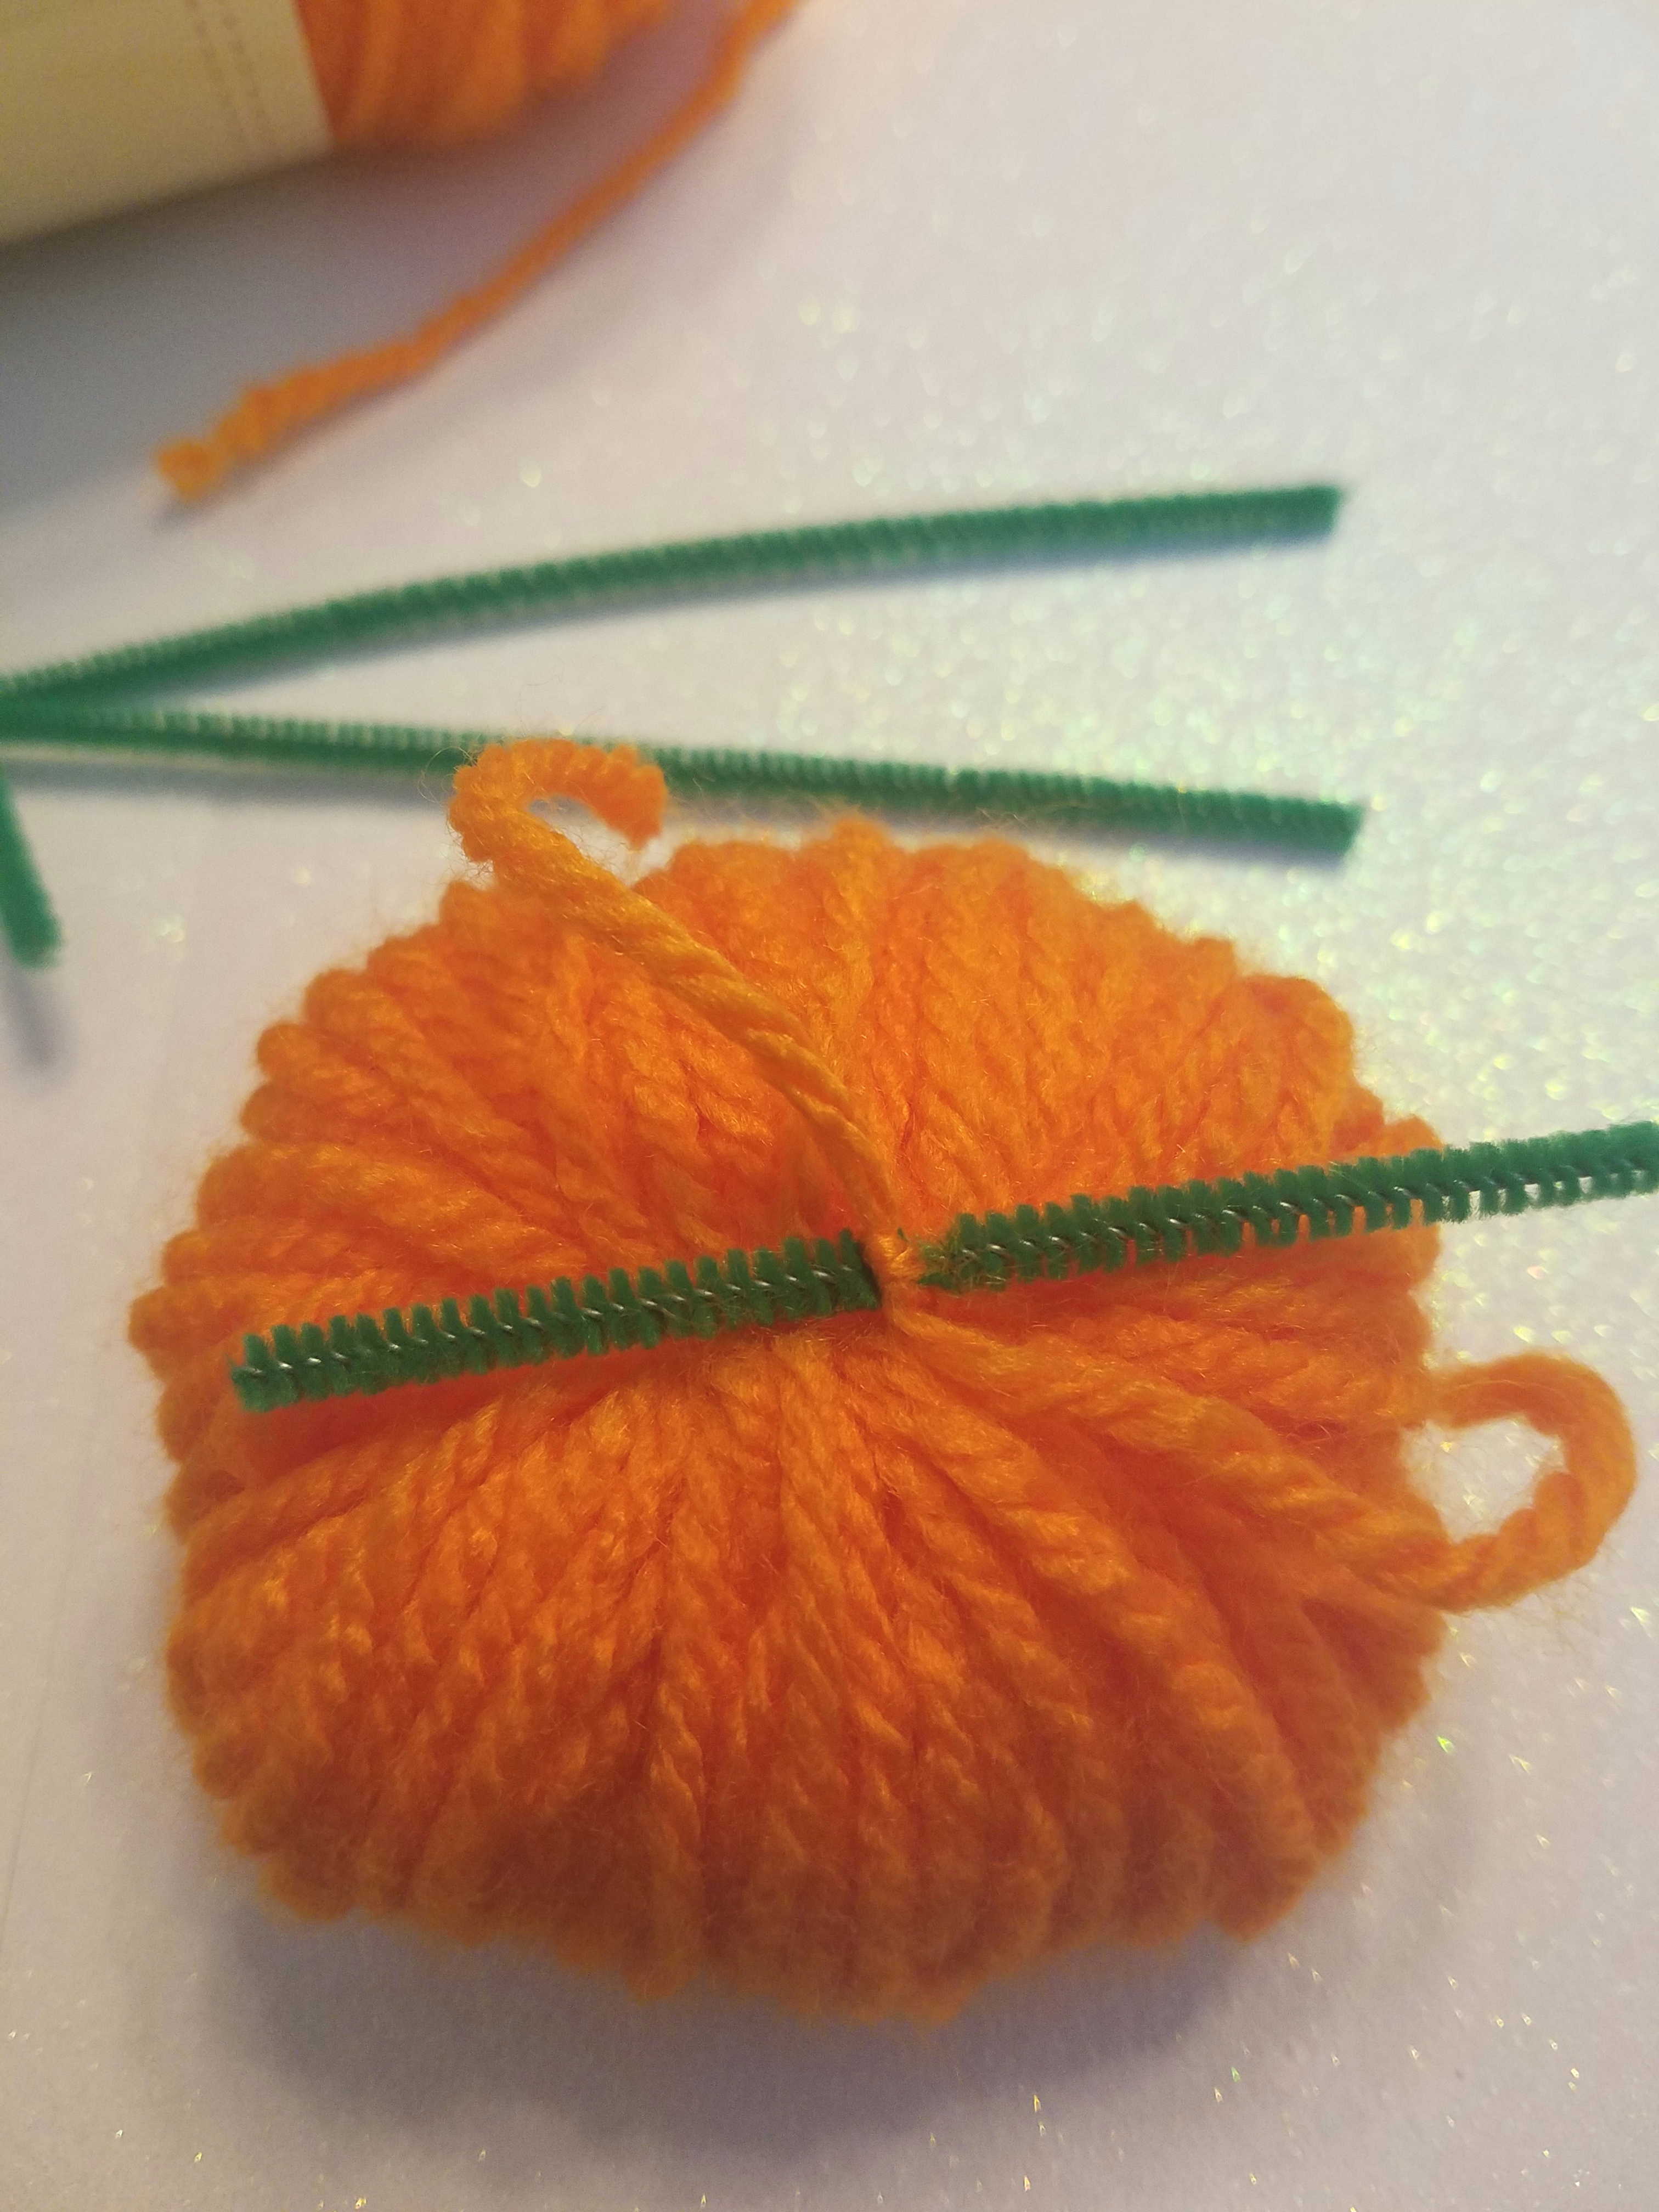
- Cut off any leftover yarn from your pumpkin.

There you have it, a yarn pumpkin ready to use to decorate! You can use your children’s hands to make different size pumpkins. You can also take some twine or string and create a pumpkin garland by tying the pumpkins into place before cutting the excess yarn from the pumpkin in the last step, or you could just use them to decorate around the house. You could even use them to create a cute centerpiece for a table!
Lessons learned:
With any craft that I do, I like to reflect on any lessons that I learned along the way. I learned two very important ones with this project. First, do not wrap the yarn too tight around your fingers, your fingers will begin to turn purple and it makes the yarn hard to slide off. Second lesson learned was to wrap neatly. The first pumpkin I made I just wrapped quickly crossing all over the place; it made for a very messy looking pumpkin that I had to redo!
Like this article? Macaroni Kid Fredericksburg is full of useful local information like this PLUS tons of kid-friendly events on our event calendar.
Subscribe to our FREE weekly e-newsletter for 411 on local family fun!